For some time I have wanted to incorporate video with my students. Not the video in the dvd player and sit in the classroom watching them watch TV type of video, I have wanted to have my students make their own videos and post them on the class website or on their classroom blogs. The difficulty rest in the bindings of server filters, restrictions and controls. Over the last couple of weeks the lining in the cloud has revealed itself.
One Google docs accepts video uploads and the Youtube like Video interface can be embeded where you like. Such as right here.
Second is a web based application one of my students discovered called Stupeflix It is reminiscent of Photostory 3 but as a web based app it provides embed codes for your one minute image based and text videos.
Removing the tethers of video hosting sites makes student video production an exciting new frontier for my classroom.
Monday, May 16, 2011
Sunday, March 20, 2011
Debate Brackets
This lesson was inspired by the New Times lesson plan March Madness: Using Tournament Brackets to Debate Academic Questions and the academic debate game Point-Counterpoint. The object of the lesson is to get learners to understand the value and defend-ability of the evidence that supports the main idea of a debate topic or the thesis of a persuasive essay. The graphic to the left is used to create a graphic representation of the different pieces of evidence in a pro vs. con strategy. The activity takes place in two parts. First a round of Point-Counterpoint is used to create the outside brackets. Afterward, learners break into small groups to challenge the validity of the individual ideas. As ideas are eliminated the brackets are narrowed until two standout concepts emerge as the most defendable topics. Small groups combine as topics are eliminated until two teams are formed.
Point-Counterpoint:
The Point-Counterpoint game is a simple conversation game played in pairs, small group, or whole class settings. A simple statement is made that involves one perspective of an argument. Example: "Students should be allowed to use mobile devices in schools." In a whole group format the instructor makes the initial statement then choses one learner to give the counterpoint statement. Each counterpoint must be supported by a piece of evidence and must, as counterpoint, oppose the previous statement. When the counterpoint is made ie; "Students should not be allowed to use mobile devices, because they will spend time texting instead of focusing on the appropriate task." the learner that follows must make a point that counteracts the statement previously explained. Following this example each person makes a point or counterpoint that is either connected to the topic or one of the evidence strands that emerges through the game. Think of it as a face to face forum discussion with each person making a post in real time.
There are a couple of simple procedural rules that need to be followed to make the game effective. Before you begin count of within the group so that everyone knows in advance which side of the argument they will be on. Try to start with a different person every time you play so that each learner can develop the skills necessary for arguing either side. Vary the topic statements each time you play. Once the game starts no one is allowed to repeat a previous point except to disprove it. Finally do not skip anyone. It will force everyone else to have to change sides. If someone is truly stuck they may be helped by someone who has already made their point but they must whisper it to the player in trouble who must state it out loud.

Playing with Brackets:
If the game is being played in combination with the bracket system then the debate points are recorded on the PRO or CON sides of the bracket accordingly. Multiple brackets can be added to the system to accommodate the number of learners in the room. If there are less than sixteen players then the point-counterpoint must be circled around until the all of the outer brackets are filled. All points should be recorded onto the bracket regardless without assessment at first, unless the group feels that a point is successfully disproven by a counterpoint during the initial faze of the game. Once the outer brackets are full learners should be broken up into teams of three to four. Two people argue for each bracket while the third and/or four players judge the short debate. Example: If texting and reading email were bracketed together on the CON side of the bracket above the debaters argue to see which is a more defendable reason to appose mobile devise use for students. The judges make a mark every time they here a valid statement that supports the debaters claim. Which ever argument scores highest moves on to the next round. (the losing topic is not necessarily eliminated any good evidence for the losing topic that works well can be absorbed into the winners argument for the next round.)
Depending on the level of learners this game can take anywhere from 60 minutes to several hours but it is definitely worth playing. It can be used to prepare for a debate or as a brainstorming session for persuasive writing or as part of presentation design. Try it yourself and see how much fun a good argument can be.
Sunday, March 13, 2011
"Ignite" Engagement in the Classroom
I love the "Ignite" presentation model but unfortunately many of the ignite videos are not intended for classroom use. However, it is a wonderful tool for teaching learners to use problem solving. The funny thing is that the problem is inverse from that of adults using the same framework. If your not familiar with Ignite its fairly simple the speaker gets five minutes and slides are set on an automatic timer so 20 slides change every fifteen seconds for adults the challenge comes from limiting what you have to say to the time limit. When students use ignite it can be very interesting. Any gaps in there research or ability become very clear. Any flaws in planning or preparation become clear as long as students practice beforehand. The learners in my classroom like it when I use it because they know that I have a time limit and the I won't be able to infringe on their work time.
Slide 1 About eighteen months ago I took a hard look at the methods that I was using when presenting information to my classes. I wasn't happy with the way they presented and I was board with what I was doing. What I found very quickly was a couple of new tools: Google reader and RSS feeds, and through them I realized that the professional world was screaming for a change.
Slide 2 It seems that entirely too many young professionals are presenting like this. How many of you have seen this slide or one like it. This is the typical slide created by a student for any type of presentation.
Slide 3 The problem is that they aren't competing for resources and jobs with people in the same town any more they’re competing globally. So to combat this we built 21st century classrooms.
Slide 4 And we filled our IWBs with slides like this and then we stand back and wonder why our students give boring presentations. We modeled the behavior over and over until it has become ingrained.
Slide 5 This is the diagram of a 21st century classroom. Except that it is not a 21st century classroom. It completely lacks one crucial element.
Slide 6 This is a 21st century classroom. You as learning leader and your students as learning team or teams must interact through this technology before we can begin to call it 21st century learning. As learning leader your job is to facilitate learning activities, not to give away random facts disguised as knowledge.
Slide 7 All of technology in the world is not going to make students succeed. They need to be trained on the best way to use it. This goes beyond the computer science teacher. Just as students need to learn how to read in each specialists content area, they need to learn to manipulate and output the information.
Slide 8 Students need to learn how to problem solve through relevant projects and display their solutions both as a group and as an individual.
Slide 9 This is MIT’s teaching and learning lab. The last entry says it all “lifelong kindergarten” Special thanks to Chris Lehman for pointing this out and for suggesting that all classrooms need to be transformed into something better.
Slide 10 Otherwise, we are creating these barren learning-scapes that we hated when we were their age. Every leader needs to look back at the way the were taught and not say “It was good enough for me.” Instead leaders need to change the way learning is done.
Slide 11 Forget about working inside the box. Forget about thinking outside the box. Its time to repurpose the box. Turn it into what you and the members of your learning team need. Make it work the way that you need it to.
Slide 12 This is not re-purposing the box. This is an example of presentation overload. This image actually appeared as part of the US military planning for the conflict in Afghanistan. www.nytimes.com/2010/04/27/world/27powerpoint.html
Slide 13 Visual thinking accesses the most basic and largest pathways of the brain. Yet most educators confuse visual thinking with reading. Letters and words may be based upon images but reading adds complex decoding that is necessary but not the fastest or most efficient method of information transmission.
Slide 14 There is a difference between the verbal and visual pathways of the brain. Think of the verbal pathway as a two lane road with information going in and out. The visual pathway would by comparison, be a superhighway that standard instruction does not effectively utilize. (Slide provided by Sunni Brown)
Slide 15 The typical presentation does not create engagement. They are to long and use so many bullet points that the end result is an audience that is turned off. The typical PowerPoint presentation is not designed to be an exploration of learning.
Slide 16 This is not just a US education problem. A quick scan of slideshare.com reveals that this is a pandemic. In order to stop it a movement must be created at the primary and secondary levels.
Slide 17 Learning leaders need to re evaluate how they measure success. Test and quizzes evaluate memorization not learning. Projects evaluate learning, and presentations based upon those projects reveal honestly acquired knowledge.
Slide 18 Hands on Learning allows students to manipulate information and increases retention and cognition
Slide 19 When students collaborate their ideas expand.
Slide 20 So this is my drop in the educational ocean. What are you going to do.
How to Prepare for a Presentation
I have been lucky enough to be given the opportunity to speak at the North Carolina State Middle School Conference on the 14th of March. The conference is working as paperless as possible so I am going to use this space to paste the presentation notes and slides over the next couple of days. This is good because it will give me a chance to fill in any gaps and to repost some of the best resources as well as adding new ideas from the conference itself.
After you finish your research, the first step in presenting in Mr. Freeman's class is to plan out what you’re going to present and how you’re going to do it. There are many ways to present. You could use PowerPoint, ActivInspire, Prezi, Google Presentation, or other media. Don't wait until the night before it’s due.
Rule number one is 1 idea equals 1 slide. If you put too many ideas on the same page or slide the audience, that’s everyone watching you present, will get confused and stop paying attention.
Before you sit down at the computer and try to make your presentation plan it out. Use sticky notes to write or draw your ideas. Remember 1 idea 1 note. If the ideas too big to fit on the sticky note in marker it’s too big for your slide.
Time and space are important. Ask Mr. Freeman how much time you will have and how many slides you’re allowed to use before you start. You can explain anything in ten slides. It shouldn't take more than twenty minutes, and if you use small font the people in the back can't read the information.
Never copy and paste information. If you do it is plagiarism and that will never be tolerated in Mr. Freeman's class. Your audience wants to know what you know.
Bright colors are offensive to the eye. Don't use them like this.
The human brain reads images faster than words. When you're presenting let the picture be the backdrop for your story, but use the whole screen.
If you have more than 75 words on a page it is a document which should be printed and handed out. People learn faster through images to show them exactly what you mean. If you still need them to read give them the document separately.
Practice at home or with friends before you present. Don't be afraid to get your audience involved. They will learn more about what you're trying to teach them if they are engaged in the action. Ask them questions; just make sure you know the answers. Ask simple questions first and space them throughout your presentation.
You should know all of the information that you're presenting. Face your audience as much as possible. If you turn around the audience will think that you don't know and then they won't care.
Sunday, February 27, 2011
Interactive online presentation tools
One of the things that always bothers me about presentation software, whether it be webware or computer specific is the lack of interactivity. The new read/write web demands interactivity that is not produced as part of the standard presentation. When we stand in front of an audience we are questioned and, if we are doing things well a conversation develops. Outside of a webinar there is no interaction between internet audience and ourselves, and that ends when you disconnect. My classroom has an interactive white board but once the students leave the room its difficult to replicate the whiteboard online in a way that continues to guide student learning without supervision. Looking around online I found three things that continue to make guided learning possible.
Online note boards such as Linoit.com provide a good service for students to post conversation points. If you are careful you can craft a lesson through the board by providing resources as well.
Stick boards provide interactivity but when you make them public information can be accidentally erased or can be covered if the board gets to full.
The second site a found that has worked extremely well is WIX.com. Wix is a free website service (with a premium upgrade if you need additional tools) that enables anyone to build custom websites through a drag and drop interface. I created the site below in order to give students resources for historic fiction blogs they were writing. (They had to pretend to be involved in some aspect of the war and they had to post a letter they were writing.) It does take some time to explore and learn how to use the enormous toolkit that Wix provides but you can embed the pages where you want them (anywhere that will except embed or iframe code.) Any changes you make in your console through the Wix website, because its all contained online much like Prezi or Sliderocket will show up the next time a user loads the page.
The ability to turn the pages and control the information in a compact setting gave it an interactivity that students appreciate.
Last but not least the classic Wiki is a great way to interact with learners. In the days just after the democratization of North Africa began, I knew I wanted to share what was going on with my students and then bring that back into class. I opened up a wiki and asked them, and anyone to who wanted, to post content that we could discuss in class. Wikis are wonderful in that a group can build a presentation together.
Tuesday, February 22, 2011
Peartrees
There are a lot of ways to keep track of your bookmarks on the web these days. Most of them store your links online as a long searchable list. It great to be able to access them from different computers and to share them with friends and coworkers, or to connect and collaborate with people all over the world. But its still just a big list. Pearl trees has developed something different.
A word of caution:
Like any social media Pearl Trees is a great way to connect with people. If you plan to use it to leave visual bread crumbs for students be careful to monitor your connections as you cannot control which sites other users set as links.
A word of caution:
Like any social media Pearl Trees is a great way to connect with people. If you plan to use it to leave visual bread crumbs for students be careful to monitor your connections as you cannot control which sites other users set as links.
Sunday, February 13, 2011
The Scrollwheel
We have patience for everyone who is learning to become a more effective presenter and for those who are learning at new things because they love to learn. But from time to time we all experience this.
Saturday, February 5, 2011
Not Sure Where to Present a Big Idea? Try the Hallway, All of it.
 January 27 was International Holocaust Memorial Day. Rather than stand up in class an talk, I wanted to do something different with my students. I wanted them to get an idea of the magnitude of 6 million people. Looking online I found the Yad Vasham Shoah database but quickly realized that even presenting it on the IWB in our classroom wouldn't reveal the enormity of this partial list of victims. The 166 page list of adults and children ranging from 1 to 78 years old contains over 2000 names. My classes and I figured it mathematically to be .03% of the total. What caught there attention the most was that the list as we presented it stretched the entire length of our wing of the building. As my students walked quietly down the hall I asked them to look for the youngest and the oldest to compare the number of adults to children and to determine why we have so much detailed information. When we returned to class we were able to have a discussion of the magnitude of the Holocaust that was appropriate to the meaning of the day.
Monday, January 31, 2011
Using Video to Create Autonomous Presentations
This past week I have been learning to edit video. I have used Photo Story 3 for about a year to create Ken Burns style video clips for class based out of the thousands of historic images that I have collected over the years. My students respond pretty well to them, and they do equally well with quality Youtube videos. Last week while studying the Holocaust I found lots of good videos but the big problem was some of the imagery was too explicit for 8th grade students. I also have a good number of DVD's and other long films but keying them up to just the right information and skipping through them takes valuable time.

Finally I found a great solution. Moyea's FLV editor Lite is a free program that allows you to edit flv files quickly and easily. It contains seperate lines for video and audio that can be trimmed and cut so that either or both can be removed or replaced. Those shocking images from a documentary of Youtube video can be pulled out while the commentary remains in place.
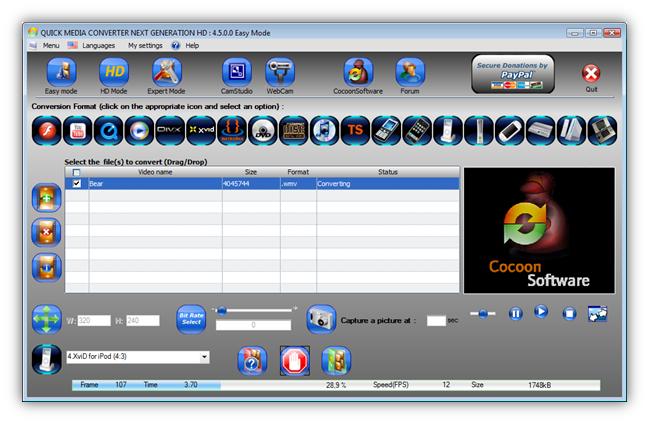 If you have video that is in any other format then Quick Media Converter is my favorite App. Its also free and simple to use. It can change nearly any video file into anything else. DVD into FLV no problem.
If your just looking to download and play Youtube videos Realplayer has a video download function that allows you to download video from almost any website. It has a trim function as well though it is not as advanced.
Here's an example. All Quite on the Western Front is available on Google video. But its a two hour film and I only need two sections of it. I wanted my students to know what life was like in the trenches of WWI, so I sat them on the floor in between two rows of desks in the dark. First I had them read from Over the Top by Arthur Guy Empey 1917.
The read Chapter IV from the book, which is only about five pages long, and then we watched the trench scene from All Quiet that is presented below. Afterward, they began writing letters home as if they were the soldiers in the trenches.
Untitled from Historyman8 on Vimeo.
I know they get more out of this than if I lecture or if they just read from a book. In order to share their letters they post them on their blogs as I mentioned in as previous post.
Finally I found a great solution. Moyea's FLV editor Lite is a free program that allows you to edit flv files quickly and easily. It contains seperate lines for video and audio that can be trimmed and cut so that either or both can be removed or replaced. Those shocking images from a documentary of Youtube video can be pulled out while the commentary remains in place.
If your just looking to download and play Youtube videos Realplayer has a video download function that allows you to download video from almost any website. It has a trim function as well though it is not as advanced.
Here's an example. All Quite on the Western Front is available on Google video. But its a two hour film and I only need two sections of it. I wanted my students to know what life was like in the trenches of WWI, so I sat them on the floor in between two rows of desks in the dark. First I had them read from Over the Top by Arthur Guy Empey 1917.
The read Chapter IV from the book, which is only about five pages long, and then we watched the trench scene from All Quiet that is presented below. Afterward, they began writing letters home as if they were the soldiers in the trenches.
Untitled from Historyman8 on Vimeo.
I know they get more out of this than if I lecture or if they just read from a book. In order to share their letters they post them on their blogs as I mentioned in as previous post.
Tuesday, January 18, 2011
Visualization
21st Century Presentation Literacy was not established as a regular posting forum, but I find myself feeling more responsible to the blogosphere to become a regular contributer. I rarely make New Year's resolutions but this year I have decided to try to make more regular editions to the blog and to expand its scope to include more differentiated methods of presenting information in the educational environment. From stand up presentations to website design everything educators do as learning leaders needs to be modeled and to be constructed with solid presentation design. The Periodic Table of Visualization below should help myself , an I hope others, craft presentations of any kind.
Special thanks to the people at Visual-Literacy.org for setting this up and for everything they do for "Communication, Engineering and Business". Remember even if it doesn't say education we still need to find ways to enable our learners to develop these same skills.
Special thanks to the people at Visual-Literacy.org for setting this up and for everything they do for "Communication, Engineering and Business". Remember even if it doesn't say education we still need to find ways to enable our learners to develop these same skills.
Subscribe to:
Posts (Atom)